11 Jul 2022

Some progress with the cowl panel

Continuing with the Falcon once again. Since the last post, I decided to keep the original engine block as it is with oddly modified main caps. Interestingly, I was told that sort of main caps modification have been more or less common thing to do in UK back in the time.


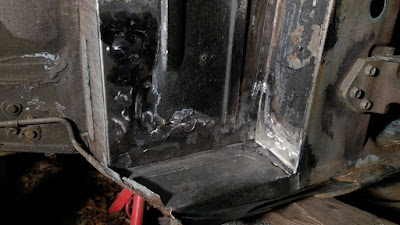
Today continued with the cowl panel. Both ends rusted away but elsewhere mainly solid.

Right end of the cowl top panel rusted away.

It felt like I was learning again how to use a MIG/MAG welding machine. Some progress though. We'll see how it sets in when welding it to place.


27 Jul 2020

Engine internals

Numbers matching engine block.
I don't have exact plans what to do with the engine. Being the original block I'd like to keep it, but instead of restoring the whole engine back to factory specs I am tempted to use some more modern performance parts.

Ford Australia stamped the blocks with the same ID number than the chassis. In 'JG66NM' J is for Australia, G is for Broadmeadows plant, 66 is for model Falcon GT Coupe, N is for 1973 and M is for March. The rest of the VIN is unique serial number.

The last engine rebuild had been done by some previous owner. I was not sure what to expect. For reason unknown to me, the previous engine removal had required cutting the frame crossmember off. After it was welded back in place, the seams were left to rust.


Dismantling the engine was interesting. The block casting number is D2AE-CA, a cast that could accept 4-bolt main bearing caps. It is a good cast from Cleveland Foundry and strong enough for most applications with standard 2-bolt caps.


Now there is something strange with those main bearing caps on this engine. There appears to be two bolts and two machine screws per each cap. As said before, this cast can be machined to accept 4-bolt caps. Like this one here I found from the Internet:

Example of factory made 4-bolt main bearing caps. Source https://www.picclickimg.com/d/w1600/pict/322253979621_/Ford-351-Cleveland-4-Bolt-Engine-Block-Fully.jpg.
It appears that my block came from the factory with standard 2-bolt main caps. Then someone working with the engine possibly thought that more bolts is simply better and instead of acquiring proper 4-bolt caps, ended up machining standard caps to accept additional screws.

I am a bit worried what this kind of modification does to the cap strength. I would be happy to go with standard caps with two bolts keeping them to the block, but now the ridges on the caps have been machined and drilled. In addition, in a real 4-bolt cap the outer bolts would be 3/8", these are more like 1/4".

As you can see from the image below, on 2-bolt caps there should be support ridges on each cap and no holes in them.

Example of standard 2-bolt main bearing caps. Source http://www.mustangtek.com/block/images/D2AE-CA_05_001.jpg. 
I might just try to get a set of real 4-bolt main caps and have a professional machine shop to fit them over the existing bungle.

No other surprises popped up yet. Some main bearings showed worn grooves but nothing major.


The block was drilled to .030" oversize. The pistons used were Keith Black Silv-O-Lite Cast Pistons 1159. These are dished pistons, producing a bit less compression than the stock engine. Out of curiosity I calculated that the engine have had static compression at the ballpoint of 9.8:1.


23 Jul 2020

News at last.

Last time I wrote I was putting the car in storage for a while. That turned out to be over three and half years. During this time I lived over two and half years in New Zealand and collected some bits and pieces. While at that side of the world, I also visited Ford Broadmeadows Assembly Plant site at Victoria, Australia where my Falcon was built.

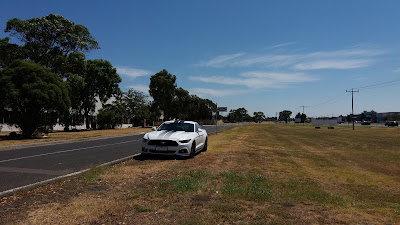
Visiting Broadmeadows Assembly Plant site in Feb 2019. Car rentals there don't list Falcon GTs, that's the reason for a ponyride.


Back home in Finland the Falcon was kept in a ventilated storage and was exactly as I left it. I thought it would a good time to take the engine out for a full rebuild. There is still a lot of rust repair waiting but I'll return to that later.


The engine bay looks like any old car with all the extra wiring, aftermarket stuff and quick fixes in a mess. I had the heads removed about 20 years ago, replaced the camshaft and timing chain etc. and just put it back to running order. The radiator got a new core at the same time but mainly I just kept the engine as it was.

The original cast iron intake manifold had been replaced by Edelbrock Performer LB 351-4V manifold.
I noticed the original cast iron intake manifold had been replaced by Edelbrock Performer LB 351-4V manifold. Quite common and understandable modification, except this manifold #2665 is intended to be used with "Ford 351-C and Boss 351 engines originally equipped with a 4-barrel carburetor and 4-V cylinder heads" (https://www.edelbrock.com/performer-351-intake-manifold-for-ford-351-4v-cleveland-2665.html). The heads on this engine are Australian ones with 2V head intake port size (1.375" x 2.05"). The manifold did fit mechanically but there was noticeable port size mismatch. It's worth to mention that Edelbrock Performer manifolds #2665 and #2750 for 351C came with smaller port exit dimensions than the ports on the heads; for 4V #2665 - 1.37" x 2.15" and for 2V #2750 - 1.30" x 1.86". This intentional mismatch have been addressed in the product special instructions section:
NOTE: After just purchasing the Edelbrock Performer for my 351C 2V, there is a SPECIAL INSTRUCTIONS section that is nice to know: The port size of the Performer 351-2V and the Performer 351-4V manifold was thoroughly researched and was designed smaller than the head port for several reasons. Although appearing small in size, the legs of this manifold not only flow more than the port in the head, but they also increase the flow in the head. The design of this manifold allows us to use great runner speed which prevents fuel dropout and gives us better fuel and air suspension. This combination is excellent for throttle response, total performance, and provides very favorable emission qualities. As a final note, please do not attempt to match the manifold to the ports. This will not only hurt performance, but it will upset many of the fine features that took months of research and development. (http://web.archive.org/web/20050317051408/http://stangstable.com/manifold.htm)
 Whoever replaced the original manifold should have used #2750 manifold for 351-2V instead.

351C Australian head (2v ports with closed wedge chamber)
The heads came off without issues. I had them checked 20 years ago and to be honest haven't driven much since.


 Remaining engine detached from the transmission easily and was lifted off.


It would be interesting to see the internals..


3 Dec 2016

..and finally lower left part of the pillar and the side panel.

It's been a while since last update. We have had some snow which already melted away and I'm still working outside. The progress is slow as I've been working with various other things and repairing in freezing temp isn't too comfortable.

Here, repairing the sill panel part.


Small section to the passenger legroom space and a thicker patch in front of it.


And then rest of the side panel and the pillar.


I also had the hood blasted with soda. Sand was used in rusted spots. Only some minor spots were rusted through at the front edge.


I guess I'm putting the car in storage for a while soon. I have some other things I'm looking forward at the moment.

27 Oct 2016

Finishing the upper part

It's about time to post some photos. I've continued with the car when I've had time.


Patches here were easy to do. The upper part of the pillar is now quite good. 


I continued to the lower section of the pillar and side plate. This side is much better than the other was but there is rust to repair.


I also tried rust removal from parts by bathing them in citric acid. These parts were only lightly cleaned beforehand. Here the parts are just after the acid bath. Note painted areas are not effected.


Are we having a GT-specific spring clip plates here? (No, they aren't specific to GT and common in various models)


Christmas came early this year. We're having the first snowflakes too. The rear arch repair panels I ordered few months ago arrived today. Made by Kustom Garage and the quality looks and feels really good.


11 Oct 2016

More pillar work

Continued with the left side pillar. Patched the top of the pillar and repaired the upper door hinge mounting area.
 Fitting the next patch on the top of the pillar.
Same patch welded and grinded.
Next patch to the door hinge mounting area.
 Just welded..

7 Oct 2016

Cowl and pillar again

Some welding and grinding during last nights. Again, photos tells it all.


5 Oct 2016

Cowl and pillar continued

Slow progress again. Fitted one of the new patches and welded it
Bits and pieces

Fitting the patch

Welded in place

Welded. Could be worse.

Cowl and pillar

Some photos again. I continued with the cowl area, removed the left door and examined the hinge pillar. This side is somewhat more solid than the other.


I already cut and bent the patches for these but they need more fitting. Btw. the temp was 5°C and freezing wind out there.

25 Sept 2016

Left side of the cowl

Again some progress. Small patches one by one. Photos tells it all.


At this point it was clear that the upper part of the side panel needed to be fixed before continuing.